Custom keypad dialer
Page 2 of 3Method 2: Step 1.
Let's make the keypad where the picture extends into the area where the phone number you are dialing appears, and into the lower three buttons (add contact, call and delete). T his will be for the iPhone 3G S only.Download this template graphic that I modified in Adobe Photoshop. It is in PSD format. I found this template at the MacThemes forums here. I'm hosting it since I made several changes to it which make it easier to construct the needed graphics.
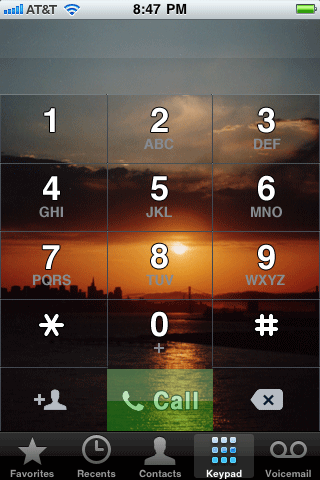
Find whatever image you would like to place on your phone's keypad. It must be 320 by 411.
Method 2: Step 2.
Open the template graphic. You may receive a warning message. I chose No.
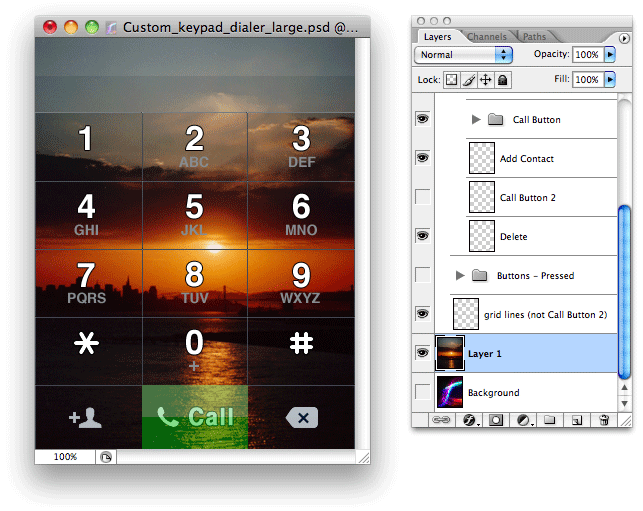
Copy and paste your image into the template.
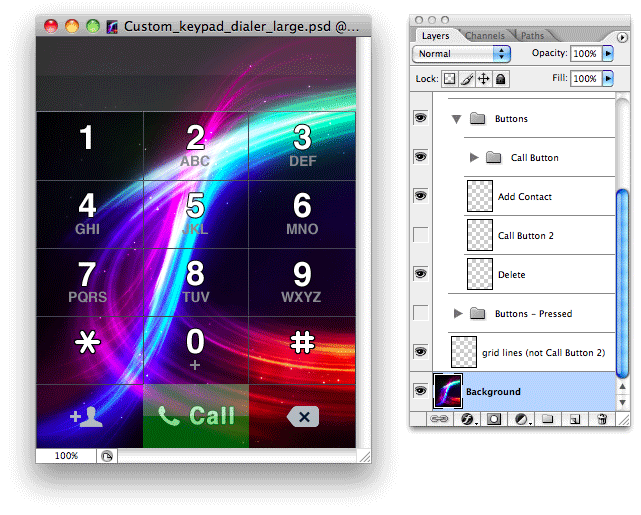
You can then turn off the visibility on the "Background" layer.
The next step is to slice this graphic up into several pieces that the iPhone will then reassemble. First we'll make the add contact button. All buttons on this screen have two states: as they look normally, and when they are pressed. Both states can look the same if you want.
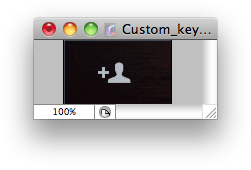
To create the add contact button graphic it must be 107 by 64 pixels in size. I am only going to demonstrate how to make a button one time. You can use the same steps, and a little logic, to create the remaining buttons with simple math. In the tool bar, click Image, then select Canvas Size...

In the pop up window, change the unit of measurement to pixels, then enter 107 in the Width box, and 64 in the Height box. Then select the lower left corner (because that's where the add contact button is) as the anchor. Click OK. You'll receive a pop up warning about the image being clipped, that's ok. We will undo this clipping once we have the buttons we need.

There's your button. Save this image as addcontact.png.
Next make the version of this button when it is pressed. Go back to the template graphic, check the visibility for the layer Buttons - Pressed. You'll notice a slight haze appears on the button. Save this graphic as addcontact_pressed.png.

Now for the most important step. Click Edit, then select Step Backward. Your entire template should now be visible again. Let's go on to the next button.

The call button is next. By default, this template creates a call button with a green haze on it. If you'd rather not have a green button, then go to the Buttons layer, click the arrow to expand everything inside this layer. Turn off the visibility on the layer that says Call Button, then turn on the visibility of the layer that says Call Button 2.
The call button is 106 by 66. Use the Canvas Size tool to crop the template down to the size of the call button. First get an anchor point at the bottom and crop down to a height of 66 pixels.

Then crop with an anchor point to the right, with a width of 320 minus the 107 that the contact button is which comes to 213.
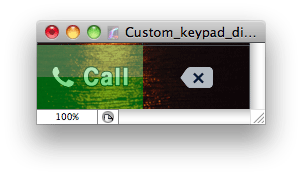
Then crop with an anchor point to the left and a width of 106. Your call button should now look like this.

Save this as callglyph_big.png. Save it again as callglyph.png. Yes I realize that on the stock iPhone keypad the call button does get brighter when you press it. This will not happen using this method.
Now for the most important step, again. Click Edit, then select Step Backward until your entire template is again visible.
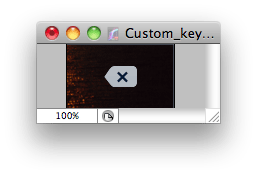
Let's make the delete button. It is 107 by 64. Use the Canvas Size tool to crop the template down to the size of the delete button. Enter 107 in the width box and 64 in the height box, then select the lower right corner as the anchor point. Click OK. Your button should look like this. Save this as delete.png.
Go back to the template graphic and turn on the visibility for Buttons - Pressed. Save this image as delete_pressed.png.

Now for the most important step, again. Click Edit, then select Step Backward. Your entire template should now be visible again.
Let's make the dialing keypad next. It is 320 by 273. Use the Canvas Size tool. The width should be 320, and the height (minus the bottom 3 buttons) 347. Click the top row as the anchor point. Click OK. Use the Canvas Size tool again. The width is 320 and the height is now 347 minus the LCD bar height of 74 leaving 273. This time click the bottom row as the anchor point. Your keypad should look like this. Save this as dialerkeypad.png.

Go back to the template graphic and turn on the visibility for Buttons - Pressed. Save this image as dialerkeypad_pressed.png.

Now for the most important step, again. Click Edit, then select Step Backward only one time. Your template should now look like this.

Let's make the dialer LCD graphic. Use the Canvas Size tool. The width remains at 320, but the height is 347 minus the keypad height of 273, which is 74. Click the top row as your anchor point then click OK. Your template should look like this. Save this file as dialerlcd.png.

Method 2: Step 3.
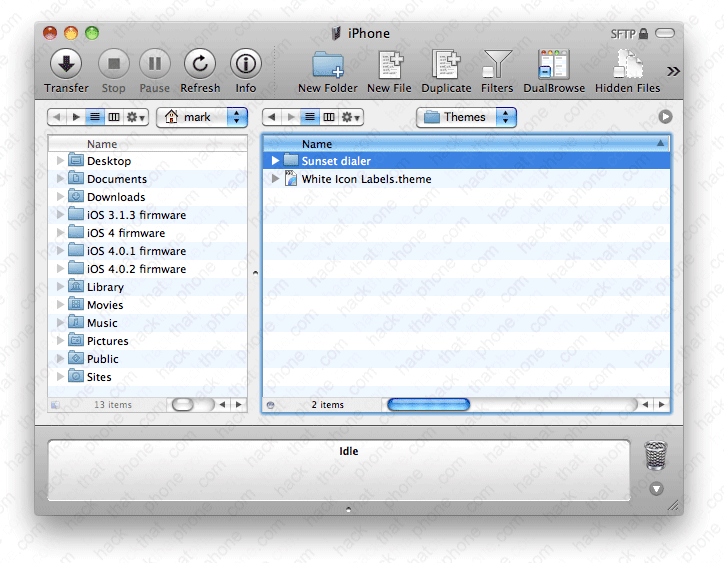
Create a folder for your phone theme, mine will be Sunset dialer, then create the following folders: Sunset dialer/Folders/MobilePhone.app Note: you may want to wait until you've placed all your image files into the MobilePhone folder before adding the .app extension to it.
Place your theme folder into the iPhone's Themes folder.
Launch Settings, then go into WinterBoard and check out your new theme.