Unlocking the 3G S iPhone on 3.1 firmware using PwnageTool in Expert mode
Page 1 of 2
Who is this guide for?
- Currently jailbroken 3G S iPhones on 3.0 or 3.0.1 firmware only, with 4.26.08 modem firmware only. I only had my 3.1 ECID SHSH on file with Cydia.
- Make sure to Sync your iPhone prior to using this tutorial. This way your personal information, and any App Store applications will be preserved.
- I used iTunes version 9.0.1.
- I used OS X 10.6.1.
Thanks again go out to the iPhone Dev Team for providing this amazing, and FREE program for jailbreaking, activating, unlocking, and customizing the 1st generation, 3G and 3G S iPhones. You can visit their website here, and their blog here.
You might want to read this article over at The Unofficial Apple Weblog, which discusses all the problems people are having with 3.1 firmware who are not jailbroken. There are several links to the Apple support forums where there are discussions about these problems. You might also want to read this thread at the Apple support forums as well.
Step 1.
You are about to take a big step with your currently jailbroken iPhone 3G S, so let's verify a couple things first. Ensure you are on 3.0 or 3.0.1 firmware with 04.26.08 modem firmware. You can check this in Settings, General, About. Some of my fields are empty, I block these out for privacy reasons.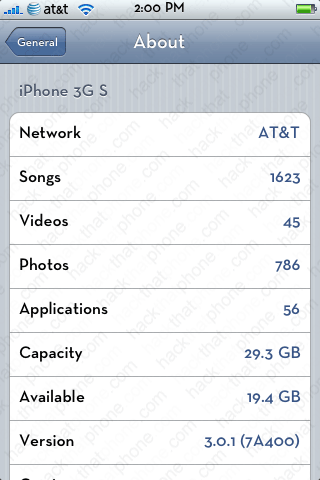

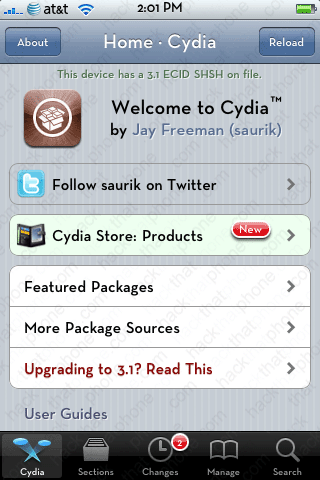
You should also launch Cydia and see that your ECID SHSH is already on file. If you don't see the text "This device has a 3.1 (or 3.0/3.0.1) ECID SHSH on file."... Then you should see the screen on the right. If that is the case, then press the button that says "Make my life easier, thanks!"

You might want to learn how to backup your ECID SHSH and store it locally on your computer, should Cydia go down for whatever reason. Learn how to do this here.
Step 2.
Download PwnageTool 3.1.3 from the iPhone Dev Team's download link list here. You can also download it from me here.If you haven't already downloaded 3.1 firmware from Apple, then you can download it here. Note: Safari likes to open "safe" files by default. You must turn this feature off for this download to work correctly. Click "Safari", select "Preferences", from the "Geneal" tab uncheck the box that says "Open "safe" files after downloading". Otherwise just use Firefox to download this firmware file.
You should now have these two icons on your desktop. If your firmware file ends in .zip, then click on the firmware icon and remove the .zip extension from the file name. Confirm this change when you receive a pop up message warning.

Step 3.
Double click the PwnageTool__3.1.3.dmg. It will open the window seen below. Install PwnageTool. Make sure to drag the program icon from the disk image into your Applications folder! Do not attempt to run the program from the disk image window, it will cause problems. If you have a previous installation of PwnageTool, then overwrite it.
Step 4.
Launch PwnageTool. Make sure the Expert mode button in the top left corner is selected. Click the iPhone on the right.
You should get a green check mark on the iPhone you selected. Click the blue arrow button in the lower right corner.

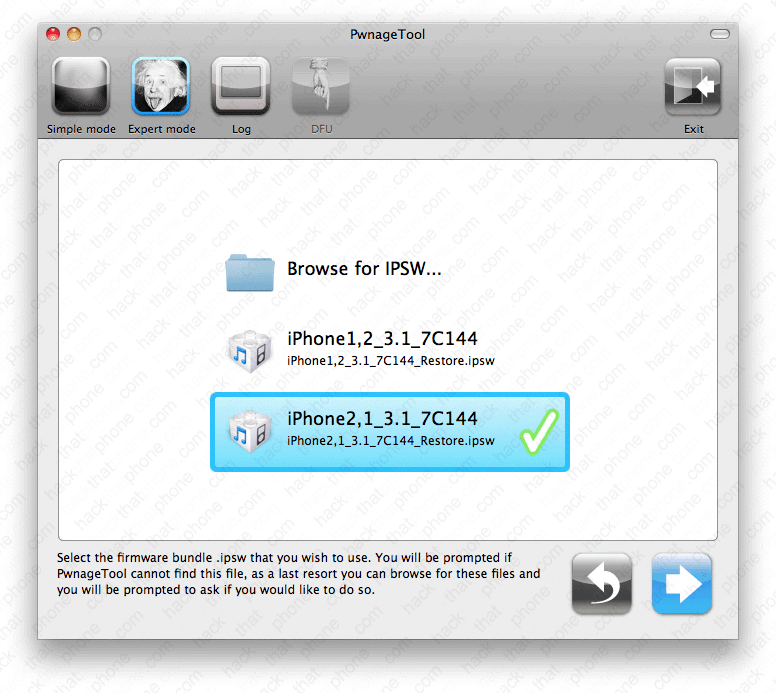
PwnageTool will search for the 3.1 firmware on your computer. When it displays the firmware file, click on it. Multiple firmwares may be displayed, so make sure you select the correct one. Then click the blue arrow in the lower right corner.
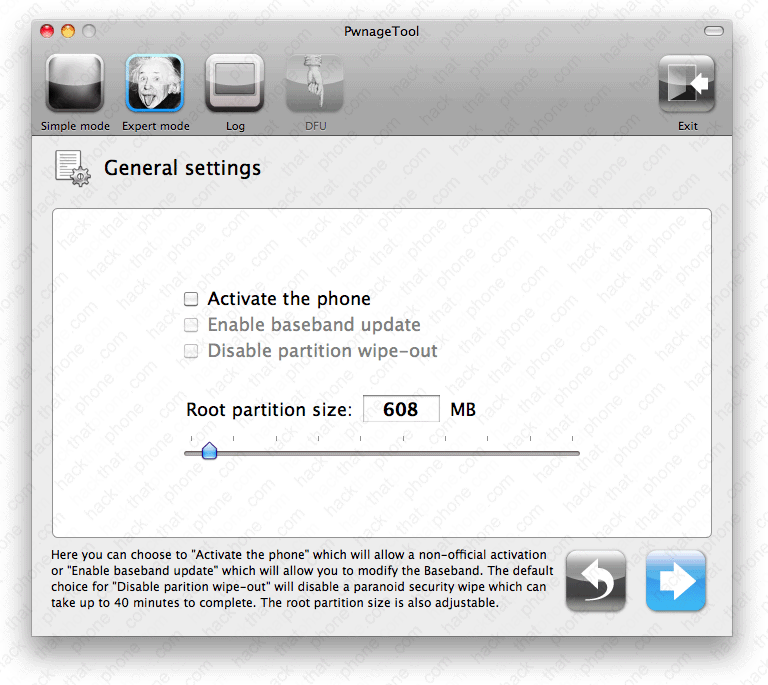
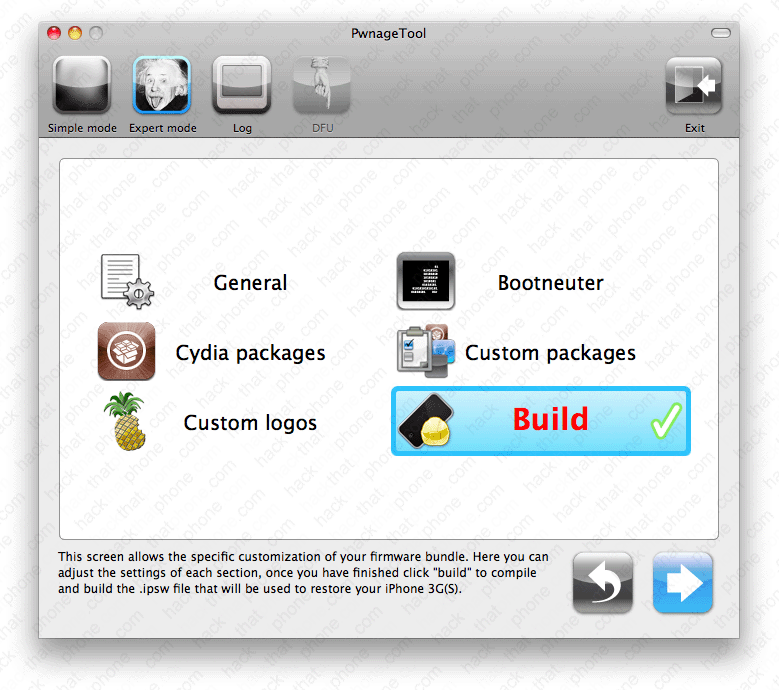
You will be at this screen and have many choices you can make. Click on General. Then click the blue arrow at the bottom.

At the General Settings screen, if you are using an authorized carrier, then do not check the box for Activate the phone. If you are not using an authorized carrier (i.e. you want to unlock), then check the box for Activate the phone.
Note: If you are interested in having push notifications working (I don't use this so I can't attest to it), you will need to activate your iPhone with an official SIM. Push does not work on hacktivated iPhones. So when using PwnageTool you will need to uncheck the activate Phone box.
You can also increase your root partition size to accommodate lots of Cydia applications and themes, et cetera. Click the blue arrow in the lower right corner when you have made your choice(s).
At the Bootneuter settings screen there is nothing to do. Click the blue arrow in the lower right corner.

Based on Saurik's advice (the creator of Cydia), I ignore the Cydia settings screen in PwnageTool. It is better to install any applications you need from Cydia directly. I've found problems when using this screen to automatically install programs. Just click the blue arrow in the lower right corner, to continue to the next screen.

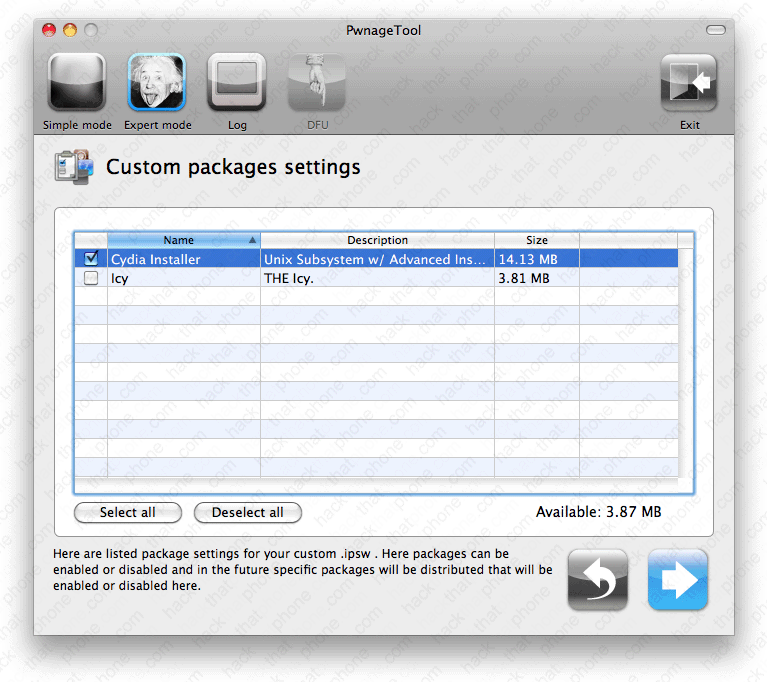
Here you can decide whether or not to install Cydia, or Icy. After you've made your choices, click the blue arrow in the lower right corner.
At the Custom logos settings screen, you can choose to use the suggested images by leaving their boxes checked, or uncheck them and use the stock images. If you check the boxes you can click on Browse... to add your own images in their place. Click the blue arrow in the lower right corner when done.

Here is the boot graphic I like to use. It is 320 by 480 in size. It has a one pixel, transparent border on all sides. All you have to do is paste in your 318 by 478 image onto it and center it. Then just save the image with the transparency intact and your image will work. Make sure your saved image is 100kb or less.

Finally, click the Build button and the blue arrow in the lower right corner.
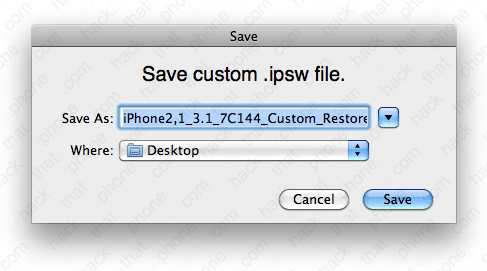
Name your custom firmware file, and select where to save it.
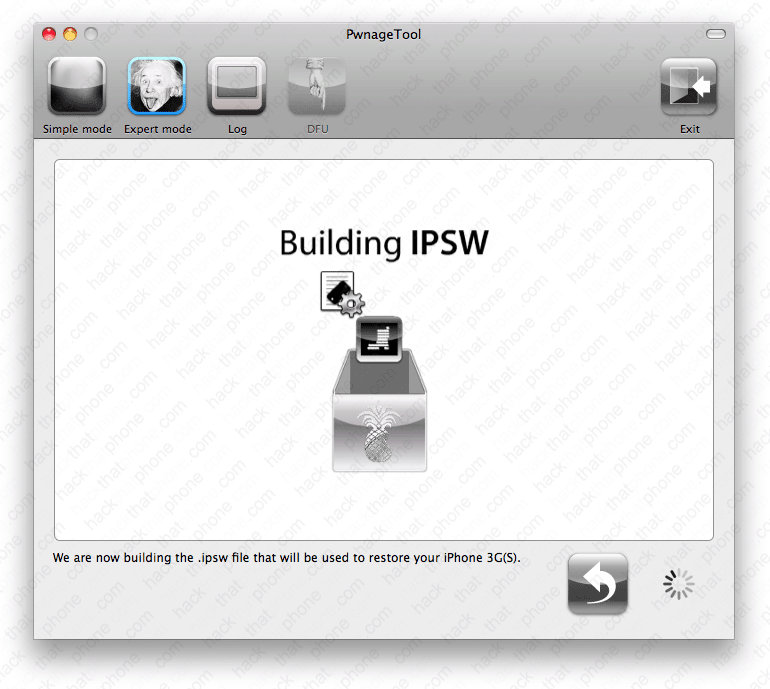
You will now see this screen while your custom .ipsw is assembled. This stage is about five minutes long.
If you should receive a failure message, then start over. Close and restart the PwnageTool program.

You will be prompted to enter your system password. There is nothing nefarious in this request, the reason it is asking is because it is creating your firmware and running commands as the root account (or superuser) on your computer. There are various processes where unmounting and mounting of a file systems is necessary. This is performed while using a system UID of 0 which causes the prompt for a system password. The root access is only for the creation of the ipsw file. So it's completely harmless.

Next you'll be told to put your iPhone into recovery mode. Click the OK button.

Click the Exit button to close PwnageTool.

