So you screwed up your iPhone 3GS?
Who is this guide for?
- iPhone 3GS owners who have their ECID/SHSH on file with Cydia.
- Those on 3.1, 3.0.1 and 3.0 firmware.
I want to make clear that this tutorial is a simulation of what should happen.
I do not have a messed up 3G S to run through this process. I can certainly describe the ideal conditions for fixing an updated 3G S on 3.1 firmware (or one that just needs a restore and is already on 3.0.1 or 3.0 firmware), but that is all.Saurik wrote a very nice article about what Apple is doing with regards to keeping jailbreakers out of the iPhone 3G S. He also wrote in depth about what it is he is trying to do with Cydia to help us out. Read his article here.
Saurik has said that ModMyi.com has created a forum section specifically for questions pertaining to ECIDs that are on file with Cydia. So definitely stop by and ask all your questions here.
If you do not remember seeing the screen on the left in Cydia, and you do not have the message "This iPhone 3G[S] has an ECID SHSH on file." as see on the right in Cydia, then this tutorial does NOT apply to you.


Step 1.
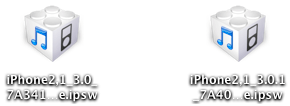
Download the firmware file you want to restore to. Note: Safari likes to open "safe" files by default. You must turn this feature off for this download to work correctly. Click "Safari", select "Preferences", from the "Geneal" tab uncheck the box that says "Open "safe" files after downloading". Otherwise just use Firefox to download this firmware file.You should now have one of these two icons on your desktop. If your firmware file ends in .zip, then edit the file name to remove the .zip so that it ends in .ipsw. The files should look just like this.
Step 2.
You need to edit a file on your Mac to tell iTunes to look to Saurik's server instead of Apple's server for confirmation of IPSW files when you restore your iPhone. Go to your Applications folder, then go to the Utilities folder. Launch the application called Terminal.app. You'll see a screen similar to this.
Copy and paste the line below into your Terminal window.
sudo /Applications/TextEdit.app/Contents/MacOS/TextEdit /etc/hosts
You will be prompted to enter your system password. Do this and press enter.

You should see your hosts file open.
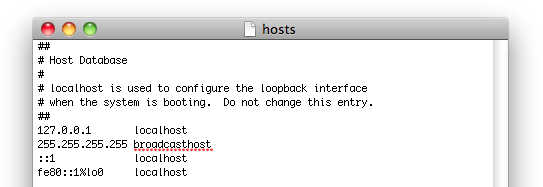
Copy and paste the line below into the bottom of your hosts file. Then click File, and select Save.
74.208.105.171 gs.apple.com

Step 3.
If you want to restore from 3.0 firmware back to 3.0, then simply restore (you might have to go into DFU mode) your iPhone in iTunes and click here for my original 3.0 firmware jailbreak and unlock tutorial. Be sure to skip step 1!If you want to downgrade from 3.1 to 3.0 or from 3.0.1 to 3.0 then restore (you might have to go into DFU mode) to your firmware in iTunes. You will receive an error 1015 from iTunes. Restore in iTunes again (yes again, as pointed out by Saurik this is needed to ensure the NAND is formatted correctly), you will get another 1015 error. At this point you should be able to jailbreak your iPhone with redsn0w or purplera1n. If you can not, then you most likely need to use iRecovery to boot your iPhone out of recovery mode. I found this article that talks about iRecovery. I could not get this to work under OS X 10.6 because the libusb provided will only install on OS X 10.5. I then tracked down libusb for OS X 10.6 at this site and it does install. However when I try to run iRecovery it won't recognize the updated libusb and wants the older version. I tried rebooting after the install of the updated libusb, but that did not help.
To continue with redsn0w click here for my 3.0.1 firmware jailbreak and unlock tutorial. Be sure to skip step 1!
