Using QuickPwn
intel Mac & PPCUpdated: June 2, 2009
Who is this guide for?
- All 1st generation iPhones (unlocks and activation will remain intact). It will not unlock you if you aren't already unlocked. Use PwnageTool to unlock with instead.
- Any firmware version. You will be updating/restoring to 2.2.1 firmware anyway.
- Make sure to Sync your iPhone prior to using this tutorial. This way your personal information, and any App Store applications will be preserved.
- Official contract, or not.
- Pwned or not.
- I used iTunes 8.1.1. iTunes 8.2 will not work! To uninstall iTunes 8.2 read this.
- I used OS X 10.5.7.
- I kept my T-Mobile SIM in the entire time.
Thanks again go out to the iPhone Dev Team for providing this amazing, and FREE program for jailbreaking, activating, and customizing the 1st generation and 3G iPhones. You can visit their website here.
Here is an excerpt from the iPhone Dev Team's website about QuickPwn:
| "QuickPwn is not a replacement for PwnageTool, they are different tools and provide different features, QuickPwn is for quickly pwning a device, whereas PwnageTool is designed to custom build and tailor the ipsw production process, both tools will be actively developed in the future." |
Apple has an excellent support document regarding update and restore error messages on the iPhone. Should you have any troubles, consult this article.
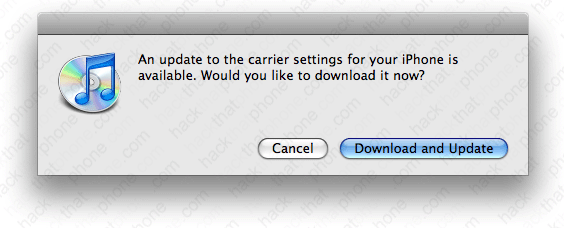
If it any point in this tutorial you should receive this pop up message from iTunes, go ahead and install the carrier settings update. It is completely harmless.
Step 1.
When you launch iTunes and plug in your iPhone you will receive this pop up message. Click Cancel.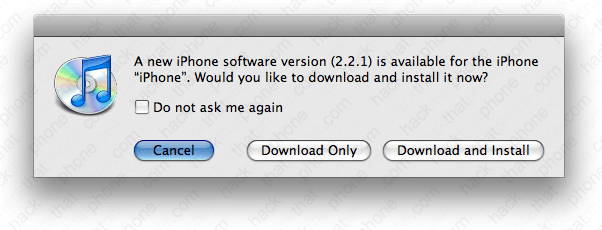
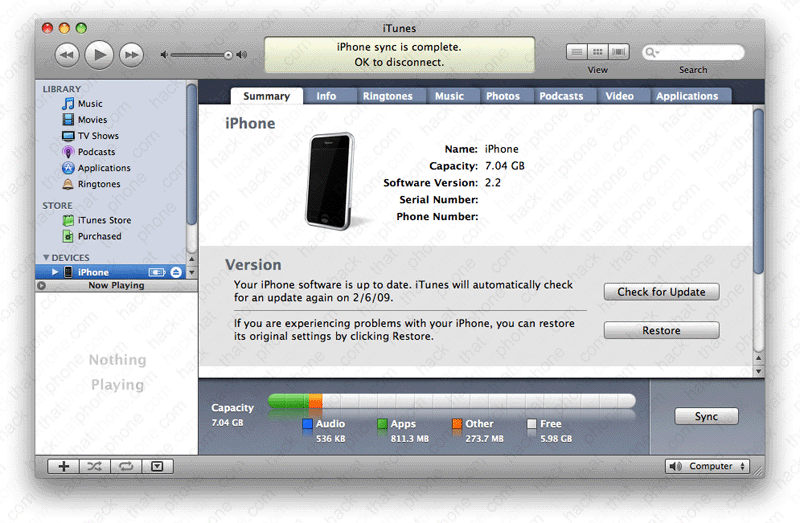
Click the Restore button. Updating is an option, but I find it can cause issues, including loss of storage space (lots of it).
You will be warned about restoring. Click Restore again.

Various messages will appear during this process.

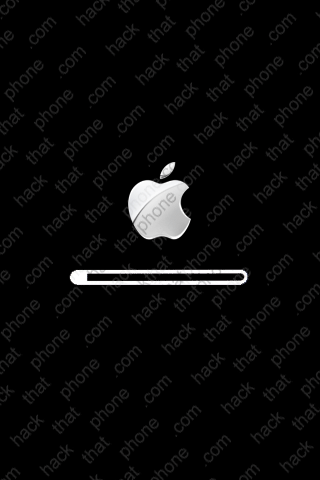
The iPhone will reboot and you will see a status bar graphic on the iPhone.
If you left your unauthorized SIM in during this process, you'll most likely see this screen next in iTunes.

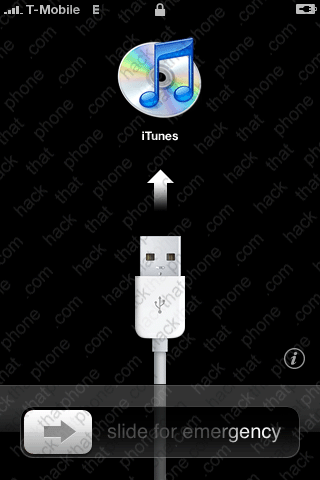
You will see this on your iPhone.
Close iTunes.
Step 2.
Download QuickPwn 2.2.5 from the iPhone Dev Team's download link list here.Double click the QuickPwn_2.2.5.dmg. It will open the window seen below. Install QuickPwn. Make sure to drag the program icon from the disk image into your Applications folder! Do not attempt to run the program from the disk image window, it will cause problems.

Step 3.
Launch QuickPwn. Connect your iPhone and then click OK.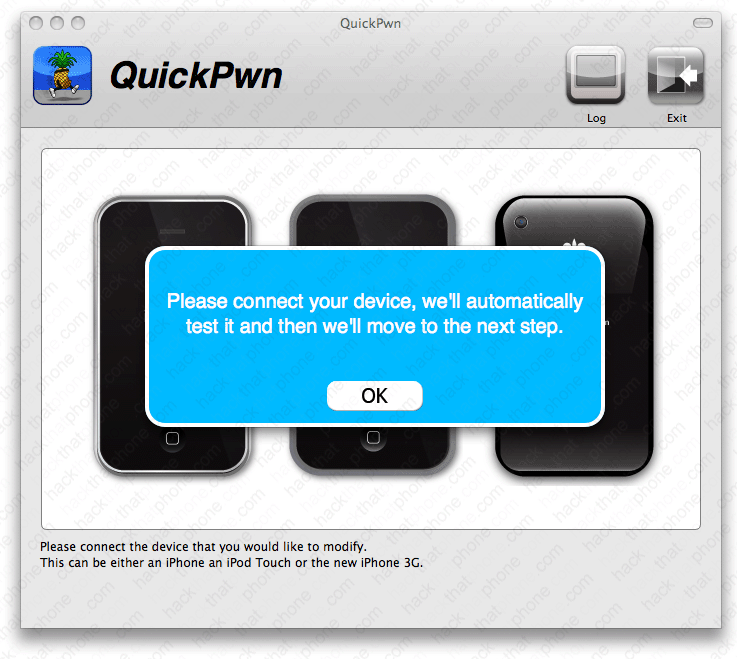
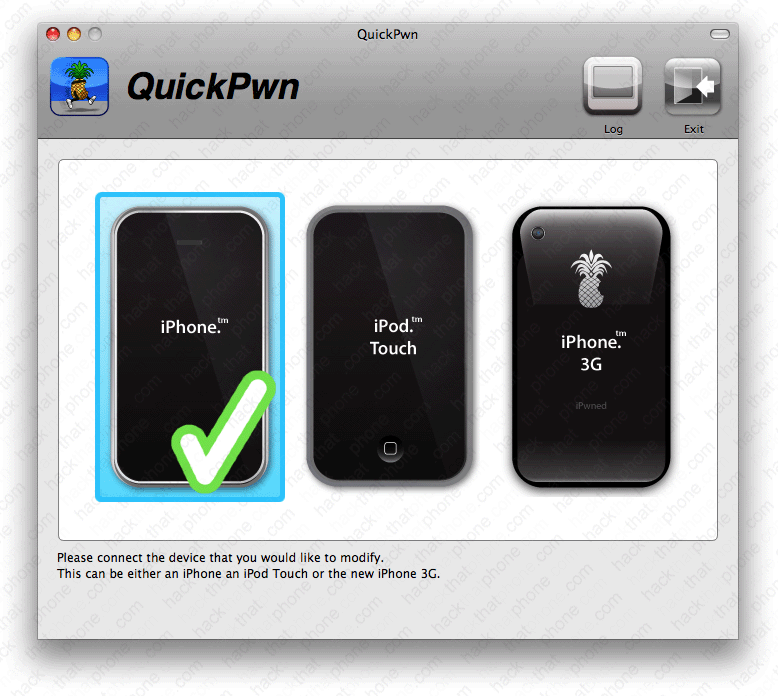
QuickPwn will detect your device.
QuickPwn will then search for the 2.2.1 firmware on your Mac. Since you just restored, it will be easy to find.

You will be asked if you would like to switch out the standard Apple boot logo, and restore screen which shows a USB cable pointing at the iTunes program logo.
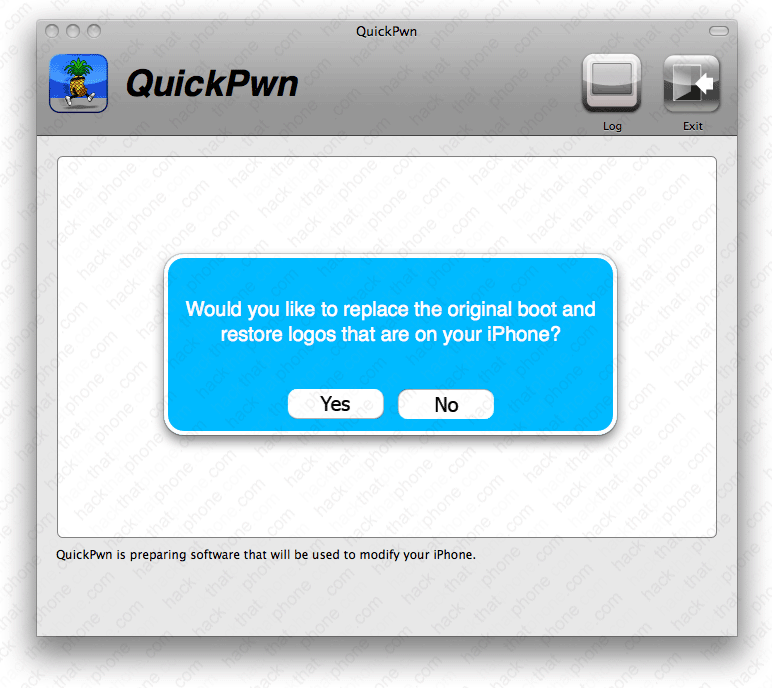
You will get a PwnApple (pineapple) for the boot logo, and a Steve Jobs caricature for the restore screen if you select yes. Otherwise, select no to leave them alone.


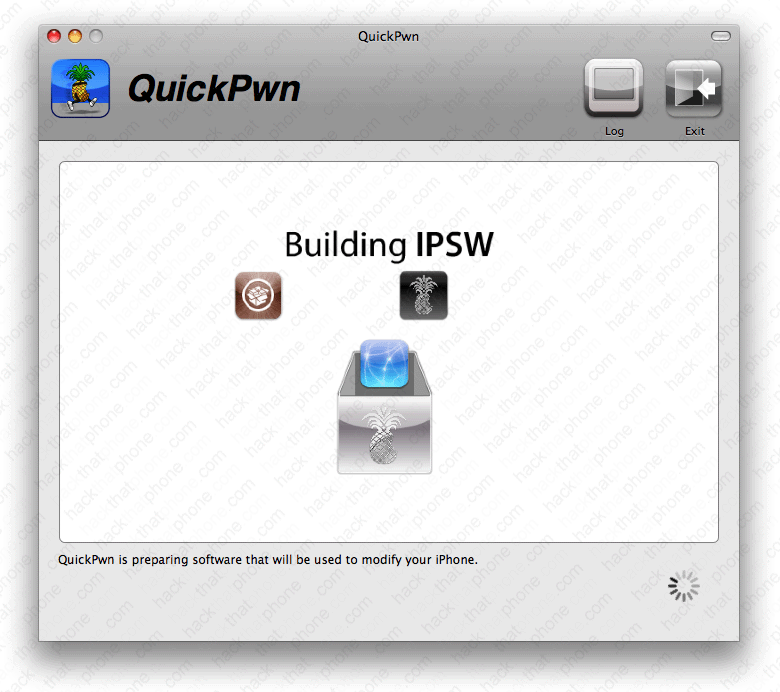
Your custom 2.2.1 firmware file will now be compiled. It will not be saved as a file anywhere, to reuse later. You must repeat this entire process should you wish to jailbreak again.
QuickPwn will prompt you for your system password. There is nothing nefarious in this request, the reason it is asking (and PwnageTool asks) is because it is creating your firmware and running commands as the root account (or superuser) on your computer. There are various processes where unmounting and mounting of a file systems is necessary. This is performed while using a system UID of 0, which causes the prompt for a system password. The root access is only for the creation of the ipsw file. So it's completely harmless.

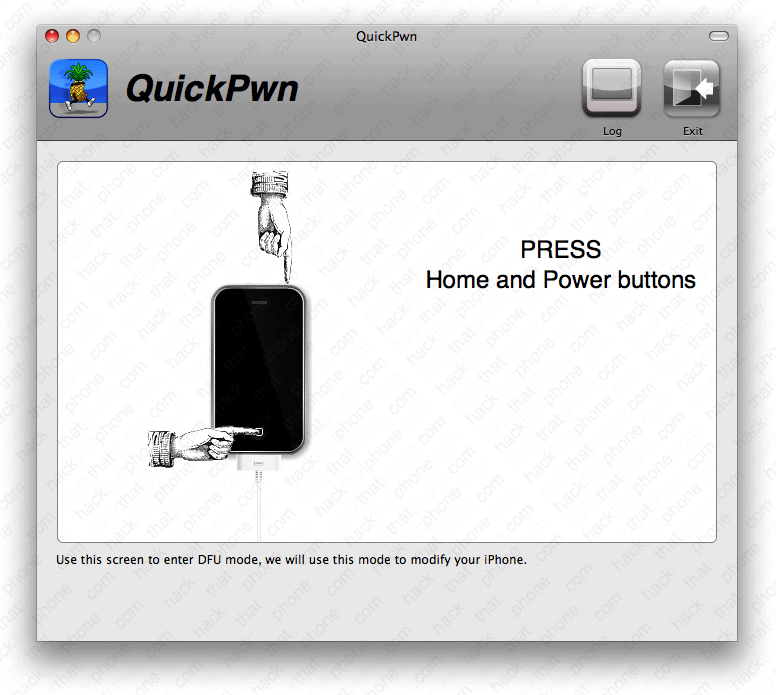
You will receive instructions on how to put the iPhone into DFU mode. Simply follow the on screen prompts to do this. Note there are many ways to get into DFU mode since 10.5.6 complicated the process.
|
If you are unable to enter DFU mode, the iPhone Dev Team posted the following information
(Warning, many Mac users complain of loss of track pad and keyboard use and USB issues):
OS X 10.5.6 introduced a bug that affected the use of DFU mode with some Macs. There have been previously published hacks and techniques to fix this, but here is another method that can be used to temporarily restore DFU functionality in order to use QuickPwn or PwnageTool.
|
| Another option is to use a USB hub (powered or unpowered) to get into DFU mode. |
First turn off your iPhone. iTunes may open, you can just drag it out of the way.

You will get 5 seconds to get your fingers in place to press and hold the Sleep/Wake (power) and Home buttons. Then hold them for 10 seconds.
Then release the Sleep/Wake (power) button.

Continue holding the Home button for 10 seconds.

You will also get a pop up about your iPhone being in recovery mode. Once again just click OK. I just dragged iTunes out of the way at this point.

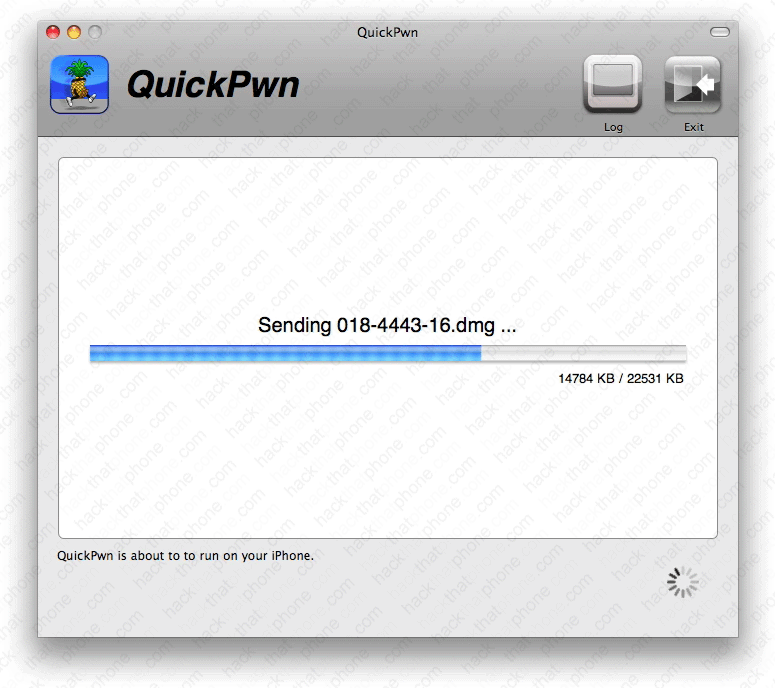
It will then send the 018-4443-16.dmg file, and some others to the iPhone.
You should see the Pwnage logo on your iPhone at this point, or the Apple logo if you decided not to change it.

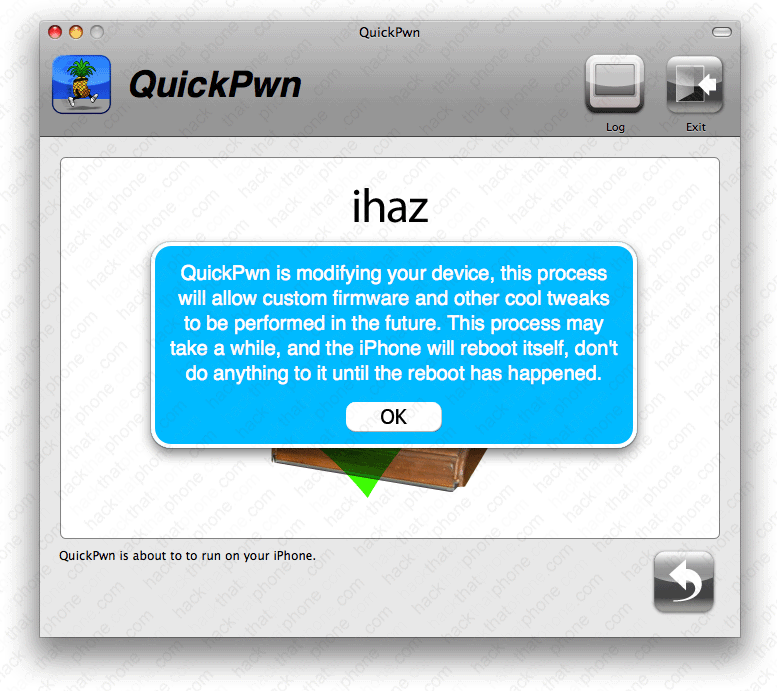
You should then receive this message. Understand what it says, then click OK and wait. This stage took about three minutes.
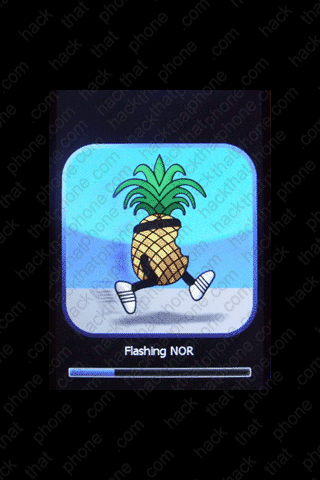
You will see a few different messages (Replacing kernel, Flashing NOR, Installing bundles, Syncing file systems) on your iPhone during these three minutes.

You should then see the success message. If it fails, then repeat the process. The process could fail for numerous reasons, the least of which being you were running (or trying to run) a memory or CPU intensive program in the background at the same time, et cetera.

Close QuickPwn.
The iPhone will reboot. Cydia and Installer have been added to your SpringBoard. Note: T-Mobile is displayed, and I have signal bars.

iTunes should now display this.
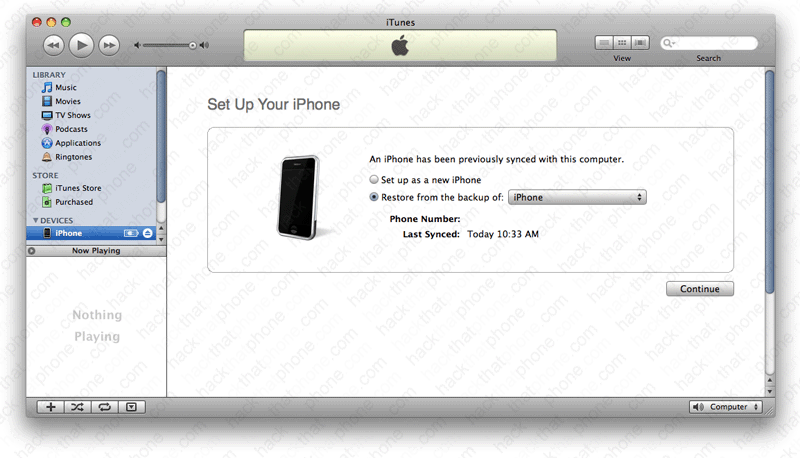
Once you have made your selection, iTunes will now display this verifying you are on 2.2.1 firmware.

If you launch Settings, and press, General, About, you can confirm your firmware versions here. I am on 2.2.1 firmware, and my modem (baseband) was left alone. You are finished.
Note: I always erase my Serial Number, Wi-Fi Address, Bluetooth, IMEI and ICCID from my screen shots for privacy reasons.


