Jailbreaking & unlocking the iPhone 3G S & iPhone 4 (AT&T) with PwnageTool
Posted: May 6, 2011Page 1 of 2
Who is this guide for?
- iPhone 3G S, and iPhone 4 (AT&T only) owners.
- Activated or not.
- Jailbroken or not.
- Must be on 01.59.00 or 5.13.04 or lower modem firmware to unlock.
- I used iTunes version 10.2.2
- I used OS X 10.6.7
Thanks again go out to the iPhone Dev Team for providing this amazing, and FREE program for customizing the iPhone. You can visit their website here, and their blog here.
Note.
This tutorial is for multiple versions of the iPhone. Make sure to read each step carefully, and follow the instructions that pertain to your phone model.Step 1.
Download PwnageTool 4.3.3 from the iPhone Dev Team's download link list here. You can either download the official torrent file the team creates or use one of the direct download links posted below. If you are concerned about the integrity of the file from unofficial sources, then use the SHA1 sum provided by the team under their official bittorrent release to validate the files linked to directly. Google how to do this, I won't cover this procedure here.You must download the firmware from Apple that you intend to modify with PwnageTool.
|
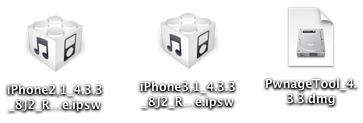
iPhone 3G S 4.3.3 firmware is here:
http://appldnld.apple.com/iPhone4/041-1009.20110503.M73Yr/iPhone2,1_4.3.3_8J2_Restore.ipsw iPhone 4 4.3.3 firmware is here: http://appldnld.apple.com/iPhone4/041-1011.20110503.q7fGc/iPhone3,1_4.3.3_8J2_Restore.ipsw |
Note: When downloading files Safari likes to open "safe" files by default. You must turn this feature off for this download to work correctly. Click "Safari", select "Preferences", from the "Geneal" tab uncheck the box that says Open "safe" files after downloading. Otherwise just use Firefox to download files.
You should now have two of these icons on your desktop. If your firmware file ends in .zip, then click on the firmware icon and remove the .zip extension from the file name. Confirm this change when you receive a pop up message warning.
Step 2.
Double click the PwnageTool_4.3.3.dmg. It will open the window seen below. Install PwnageTool. Make sure to drag the program icon from the disk image into your Applications folder!Do not attempt to run the program from the disk image window, it will cause problems.
If you have a previous installation of PwnageTool, then overwrite it.

Step 3.
Launch PwnageTool. Make sure the Expert mode button (you can use simple mode, you'll just have fewer customization choices) in the top left corner is selected. Click the iPhone on the left. You should get a green check mark on the iPhone you selected. Click the blue arrow button in the lower right corner.
Click the Browse for IPSW... button. Then click the blue arrow at the bottom.

Navigate to the firmware file you want to use. Ensure you are using the correct firmware!

Click on General. Then click the blue arrow at the bottom.

Your options are to activate the phone (which I have not checked because I have an H2O SIM to activate with.) It is best to activate with a valid SIM like AT&T, Cingular, H2O, Net10, or O2. These are SIMs available in the U.S.A. and work whether or not there is a phone number associated with that SIM. If you still can't find a SIM then you will have no choice but to check this box. Checking this box causes issues with battery drain because the iPhone is constantly trying to obtain valid push certificates through both Wi-Fi and 3G connections.
If you can't obtain a valid SIM card to activate with, I will cover how to solve this issue through the use of a jailbreak application called SAM in Step 7.
You can also adjust your root partition size. You would do this if you need more space for applications installed via Cydia. The default should be fine for most.

Based on Saurik's advice (the creator of Cydia), I ignore the Cydia settings screen in PwnageTool. It is better to install any applications you need from Cydia directly. I've found problems when using this screen to automatically install programs. Just click the blue arrow in the lower right corner, to continue to the next screen. This screen is meant for preinstalling Cydia software into the custom firmware file so that you don't have to redownload the software everytime you restore.

Here you can decide whether or not to install Cydia. After you've made your choice, click the blue arrow in the lower right corner.

Finally, click the Build button and the blue arrow in the lower right corner.

Name your custom firmware file, and select where to save it. By default the word custom will be added to your file name to help you distinguish it from a stock firmware file.

You will now see this screen while your custom .ipsw is assembled. This stage is five to ten minutes long depending on which firmware you are building.

If you should receive a failure message, then start over. Close and restart the PwnageTool program.

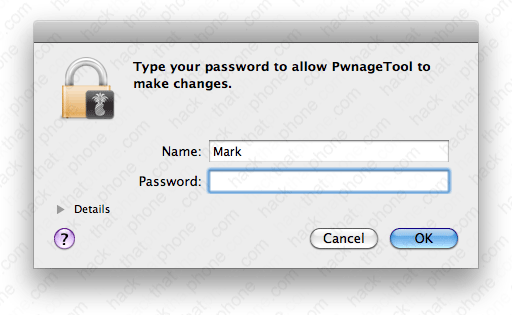
You will be prompted to enter your system password. There is nothing nefarious in this request, the reason it is asking is because it is creating your firmware and running commands as the root account (or superuser) on your computer. There are various processes where unmounting and mounting of a file systems is necessary. This is performed while using a system UID of 0 which causes the prompt for a system password. The root access is only for the creation of the ipsw file. So it's completely harmless.
As soon as it finishes creating your firmware you will be walked through placing your iPhone into DFU mode. You will not be prompted to do this, so if you miss this, just select yes when it asks if you want to try again. You will have 5 seconds to press and hold both the Power (sleep/wake) and Home buttons.

You will then press and continue to hold both the Power (sleep/wake) and Home buttons for 10 seconds.

You will be prompted to release the Power (sleep/wake) button.

Continue holding the Home button for 10 seconds. The program may appear to freeze before the 10 seconds is up. That's okay.

You are now in DFU mode. Click OK. The iPhone's screen will appear black, but it is actually on. You can close PwnageTool at this time.

