Jailbreaking / unlocking the 3G iPhone on 4.0.1 firmware using redsn0w
Page 1 of 2There is something I want to point out when I make these tutorials. All of my iPhones are day one iPhones, and I am always on the jailbreak train. This means I never accidentally update my iPhone without a jailbreak and an unlock at my disposal.
This is the perspective that my tutorials are written from. So for those of you that have to worry about new bootroms (iBoot), new bootloaders, et cetera, I am most likely not on the same upgrade path as you. I also do not have the ability to purchase an iPhone for every possible permutation of upgrade path out there to document it.
Whenever I create a jailbreaking/unlocking tutorial I also link to the latest blog post by the iPhone Dev Team discussing their latest release. The team does their best to address the various iPhone models and permutations for jailbreaking and unlocking solutions. It is in your interest to read those linked posts from within my tutorials before proceeding with my instructions. Any risks you take with your iPhone are yours, and not mine.
Who is this guide for?
- 3G iPhones.
- I used iTunes 9.2.
- I used OS X 10.6.4.
Thanks again go out to the iPhone Dev Team for providing this amazing, and FREE program for customizing the iPhone. You can visit their website here, and their blog here.
Step 1.
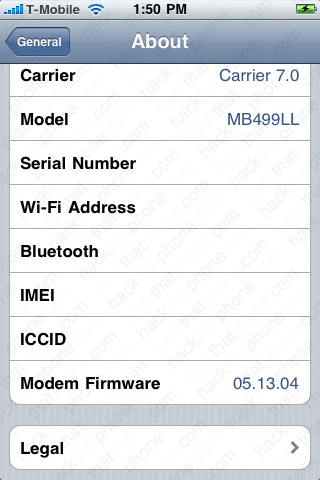
Read the iPhone Dev Team's blog entry concerning the latest version of redsn0w here. There are specific notes from the team concerning jailbreaking 4.0.1 firmware here.You should have 4.0 firmware installed on your iPhone before proceeding. Here's my about screen.

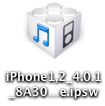
Download 4.0.1 firmware from Apple here: http://appldnld.apple.com/iPhone4/061-8616.20100715.phnt4/iPhone1,2_4.0.1_8A306_Restore.ipsw You should now have this icon on your desktop. If it ends in .zip, rename it to end in .ipsw.
Note: Safari likes to open "safe" files by default. You must turn this feature off for this download to work correctly. Click "Safari", select "Preferences", from the "Geneal" tab uncheck the box that says "Open "safe" files after downloading". Otherwise just use Firefox to download this firmware file.
Plug in your iPhone to iTunes and press the option key on your Mac, then click the restore button.

Navigate to your 4.0.1 firmware file on your computer. You are restoring to 4.0.1 firmware. You do not want to update as updating causes problems with flash storage space disappearing in jailbroken iPhones.

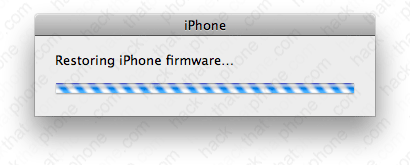
Various messages will appear while the iPhone is restored.
When this finished I was at the slide for emergency screen on the iPhone (because I left my T-Mobile SIM in).

I also received this warning message from iTunes.

Step 2.
Download redsn0w 0.9.5b5-5 (or newer) from the iPhone Dev Team here.Download 4.0 firmware from Apple here: http://appldnld.apple.com.edgesuite.net/content.info.apple.com/iPhone4/061-7436.20100621.58Yt4/iPhone1,2_4.0_8A293_Restore.ipsw
You should now have these two icons on your desktop. If your firmware file ends in .zip, then edit the file name to remove the .zip so that it ends in .ipsw.

Double click the redsn0w.zip file and the application icon will appear.

Drag the redsn0w.app file into your Applications folder.

Step 3.
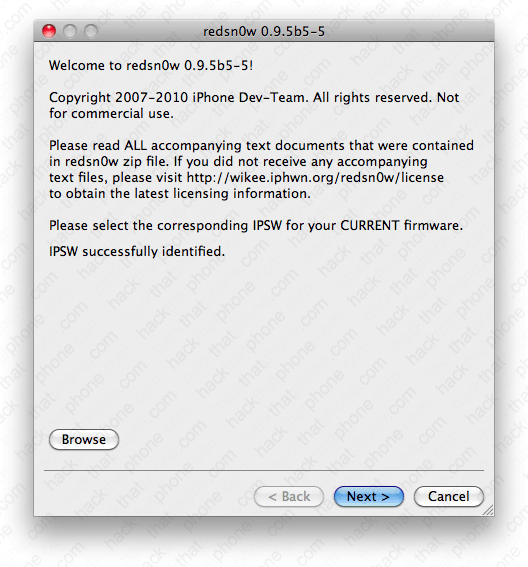
Launch redsn0w. Click the Browse button.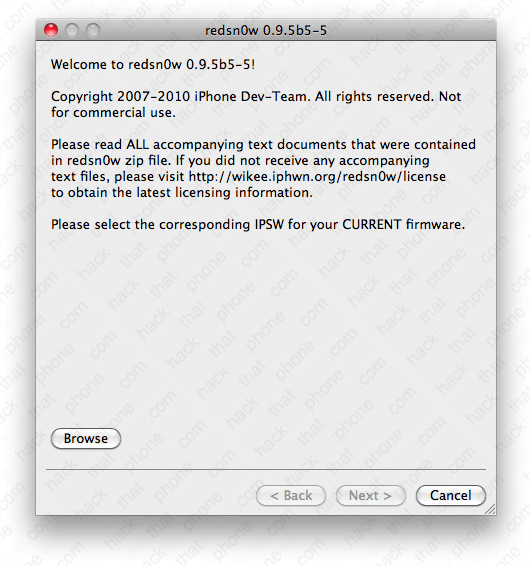
Navigate to where your 4.0 firmware file is, select it and click Open.

If you blink you will miss the lines of text that say: Processing firmware, and IPSW successfully identified. Click the Next button.
A pop up will appear and display several messages quickly.

There are several options. Make your selections and click Next. Note: enabling multitasking on the 3G really slows it down.

Make sure your iPhone is off, and plugged into your computer with the USB cable. Click the Next button.

Instructions for entering DFU mode will appear. They start right away and go very quickly so try to keep up! First hold down the Power (sleep/wake) button for three seconds.


Keep holding on to the Power button, and press and hold the Home button for 10 seconds.
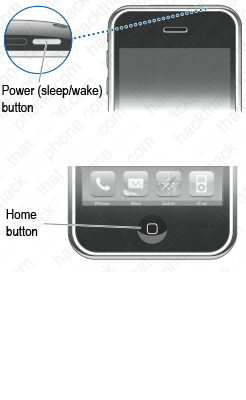
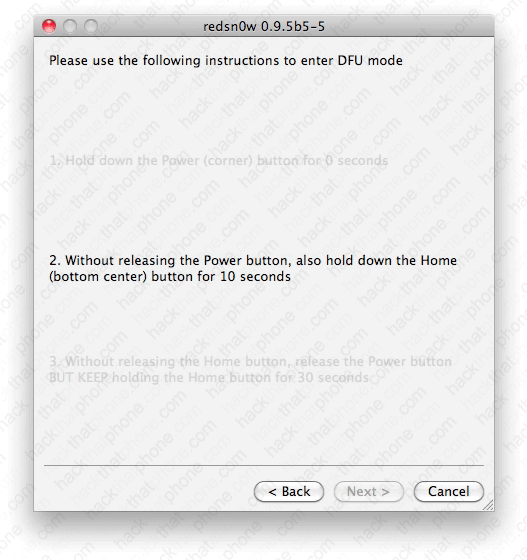
Continue holding the Home button, and release the Power button.